Spiffie.org MPGuino Automobile Installation
Disclaimer: The following information is presented in the hopes of helping you install an MPGuino. To the best of our knowledge, it is factual and current, but that could change. You are responsible for your own install. Consult knowledgeable trained automotive/electrical people/technicians/engineers wherever possible or needed. If you don't know or don't feel comfortable, don't do it. You assume all liability related to your use of this project. –Whew, with that said, it's not that bad.
An enclosure
For a clean looking install and to protect the MPGuino, most people choose to install their MPGuino into an enclosure. You'll need a box atleast 87mm x 37mm x 23mm if you intend to enclose the entire MPGuino. You'll also need to allow openings in the front for the display and buttons, an opening in left for the RJ11 connector, and optionally an opening in the right for the USB connector. The EcoModder wiki contains some examble enclosures people have built for their MPGuinos of various description. You are, of course, free to leave your MPGuino naked. We won't tell.
Find signals for Vehicle Speed Sensor, an Injector, 12V, and GND
You'll need to connect four external signals or power sources to your MPGuino. First you need to find out where in your vehicle they're located. You need:
-
Vehicle Speed Sense (VSS)
-
An Injector signal (the low/gnd/switched) side
-
12V Unswitched (always on) Power
-
A Ground point
Depending on your vehicle, these may be in any number of places. Many cars have an ECU with all of these signals conveniently supplied to it. In our test cars, this was either in the engine bay or the passenger kick-space, but it could be anywhere. Consult your vehicle's manual, repair guide, Bentley manual, friend/mechanic, the table of car settings, or the EcoModder MPGuino forum.
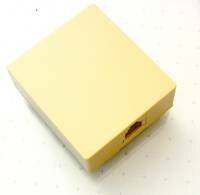
Install the RJ11 box
The RJ11 box allows you to neatly bring all four signals to your MPGuino from wherever they start in your car. Use either the included double-sided sticky-pad or the included self-tapping screws to mount the box close to where you'll tap your signals (the ECU in most cases). Orient the box so the RJ11 cable can easily exit the front end (with the connector) and the signals can easily be routed out the notch in the rear.
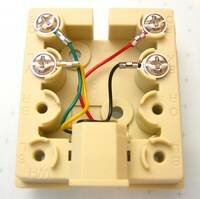
Use a flat-head screwdriver to open the box up by prying under the back lip. Now we'll connect some wires.
-
Connect +12V to the green terminal.
-
Connect Ground to the yellow terminal.
-
Connect VSS to the black terminal.
-
Connect the injector signal to the red terminal.
Close the box back up and run the RJ11 cable from the box to your MPGuino. When you plug both ends in, your MPGuino should turn on.

